Christmas 2012 Dinner Food List
As Always - Bring your Last Minute Christmas Gift Ideas
Also we are going to be making Nativity Tea Light Covers - so if you are embroidering
along - bring your machine
Please email Linda Blyth [email protected]
or call Linda Lee 433-4374 with your additions to this list:
Bring your own Drink Please
Food:
Linda L. - Sandwich Fixins
Laurie - Pasta Salad
Mary Lou - Pickles (Her famous ones)
Bea - Fruit Salad
Paula - Buffalo Dip
Deborah - Barbeque Cups
Pam - Dessert
Kathy Dublinski - Christmas Cookies
If Sewing Along - you will need to have a pattern from Embroidery Garden - Tealight for your type of machine (Janome JEF)
http://www.embroiderygarden.com/store/index.php?act=viewProd&productId=748
2 pieces of felt - and threads to match your design
usual sewing supplies (good scissors for embroidery etc)
Your embroidery machine and hoop
A battery operated tea light...can purchase the cheapest at $ store for 2/$1
but also at Walmart, Home Depot, Target, Big Lots, JoAnn's, Hobby Lobby etc
~~~~~~~~~~~~~~~~~~~~~~~~~~~~~~~~~~~~~~~~~~~~~~~~~~~~~~~~~~~
September Meeting bring ideas for upcoming meetings, demos, lectures etc.
~~~~~~~~~~~~~~~~~~~~~~~~~~~~~~~~~~~~~~~~~~~~~~~~~~~~~~~~~~~
To the June meeting please bring a dish to pass. Contact Linda Blyth at [email protected] to add what you are bringing to the list.
~~~~~~~~~~~~~~~~~~~~~~~~~~~~~~~~
Bring your favorite tool or notion and be prepared to talk about it. Does not need to be new. What new notions and tools are on the market today?
~~~~~~~~~~~~~~~~~~~~~~~~~~~~~~~~
February 2, 2012 - Reverse Bobbin sewing with Linda Blyth
Contact Linda Blyth to let her know you are coming and what you should bring with you. She will have handouts for you to follow along. Bring an empty bobbin for your machine and you need only a small machine as you will not be embroidering.
[email protected]
~~~~~~~~~~~~~~~~~~~~~~~~~~~~~~~~~~~~~~~~~~~~~~~~~~~~~~~~~~~~~~~
January 5, 2012 meeting
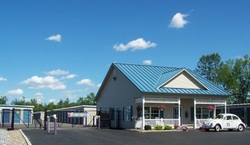
Wendy Merkle of Room to Spare Storage at 7545 Transit Rd, East Amherst, NY 14051 and Jon and Candy Dussault will be here to answer any questions you may have on selling your own craft or crafts you may have inheritated or found over the years. Also will be How to Sell your Crafts at our local craft shows. This should be exciting!!!! Bring your questions - write them down so you remember what you want to ask...You may have something that you are not attached to that is more worthy than you think...
Photo used without permission - but I am sure you will recognize the Room to Spare business location with this help...
Photo used without permission - but I am sure you will recognize the Room to Spare business location with this help...
~~~~~~~~~~~~~~~~~~~~~~~~~~~~~~~~~~~~~~~~~~~~~~~~~~~~~~~~~~~~~~~~~~~~~~~~
Kimono with Donna Kathke
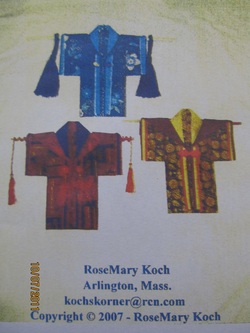
Photo of what the demo Kimono will look like - Thank you to
RoseMary Koch, Arlington, Mass. [email protected] - copyright 2007 RoseMary Koch -
MARIE is checking into ordering the pattern and having it for any of you who want it. Please contact Marie and ask her to get the pattern. It is called Kimono Art by RoseMary Koch
RoseMary Koch, Arlington, Mass. [email protected] - copyright 2007 RoseMary Koch -
MARIE is checking into ordering the pattern and having it for any of you who want it. Please contact Marie and ask her to get the pattern. It is called Kimono Art by RoseMary Koch